


|
|
|
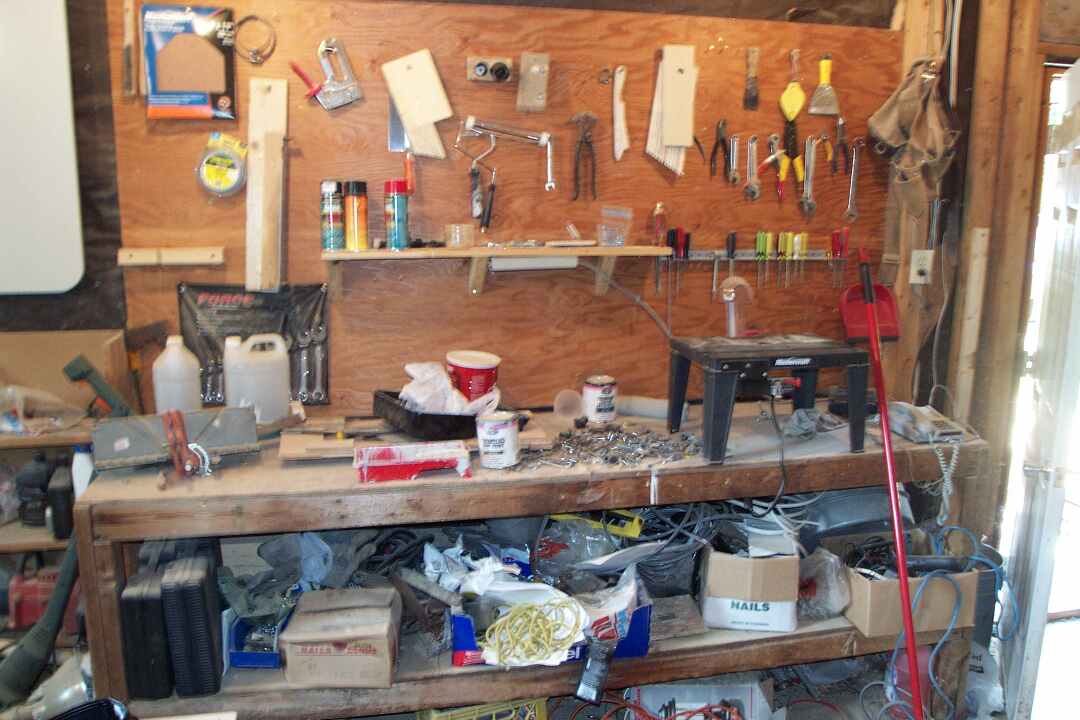
Click Images for a larger higher resolution picture. First there was a work bench, it wasn't good, it came with the house, but it
worked. On this picture, you can see MANY things. The old
router table a $19.99 Canadian Tire purchase to put the
$50 pawn shop router to good use. This work bench help produce rabbit cages, chicken pens, 100 gallon water tank holders and other assorted farm based items. Functional, but not very practical. Having to cut sheet goods on 2x4's laid on the ground (no saw horses) and running extension cables from the house as not to blow the single circuit that was to run any power tools as well as the lights. This bench also help me learn many many things of what NOT to do with tools
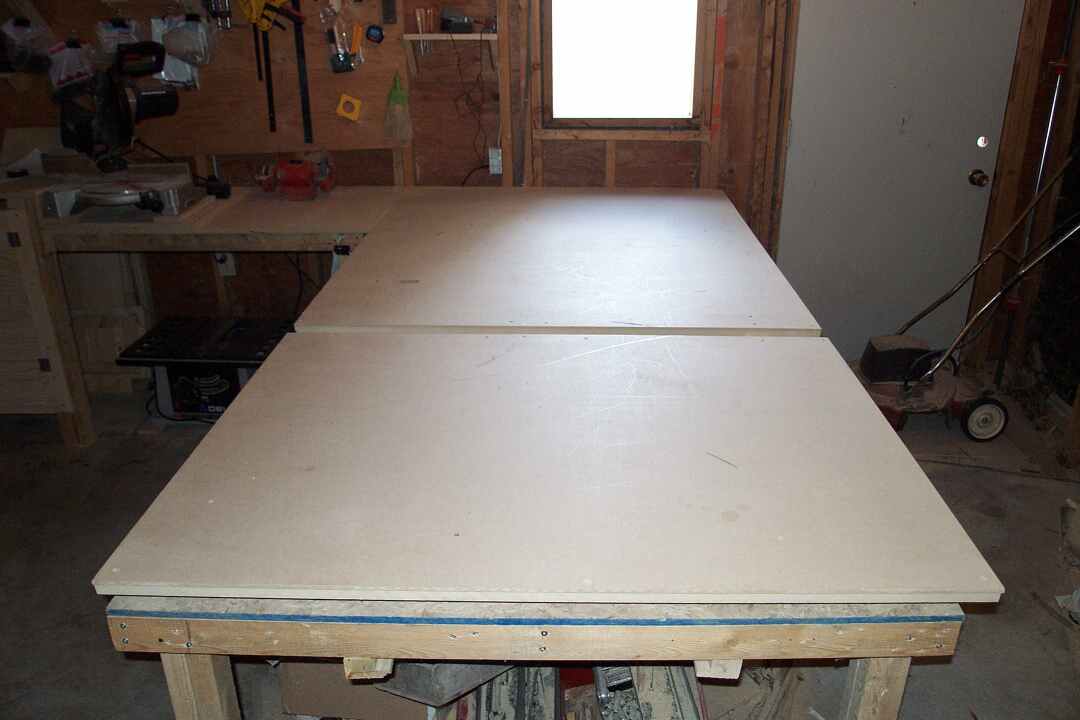
Then came the next workbench, this was originally designed to be a low bench
so my wife could continue her budding interest in scrollsaw work (intarsia and
fretwork, click HERE to
see her site). This picture is not the original table, but you can see the
remnants of the old table, the blue line is the edge of the old 1/4 OSB that
used to be the top to the old work bench, and the 2x3 (over planed 2x4) that
were used to build the legs and frame for the OSB table. I have since modified the original table. The original table was severely overbuilt, you could park a car on it and not have it squeak. I added another 2x3 frame on top of the OSB 3 inches in from the sides of the OSB. Then I laid down a 3/4 inch MDF sheet (MDF is 8'1" x 4'1", so bigger than the OSB) on the new frame on the OSB table. Adding about 80lbs of weight. Then I laid a 1/4 inch sheet of MDF on top of the 3/4" MDF to give me a easily replaceable top. In case your wondering, since I work for a company that owns a MDF plant, I get MDF for a much reduced rate. Just recently I added the slot you can see about halfway down the table. This slot goes right through both sheets of MDF to the sub frame of the 2x3. I had seen in the really expensive work benches this groove running down the tables. I just could never figure out why. I learned that the slot allows you to lay an entire sheet product (4x8) down and cut it in half or pieces of it off with BOTH sides of the cut being supported. This is one of the many items I have added to my work area and wondered how I ever got by before without them. I thinking of adding another groove down the middle length wise to allow ripping of full length sheet products, but I am concerned that it would take up too much of my work space. If you look at the pictures closely, just after the groove you can see where I have started to make holes to allow for clamping etc. I have decided to cut these as needed instead of trying to guess what I want.
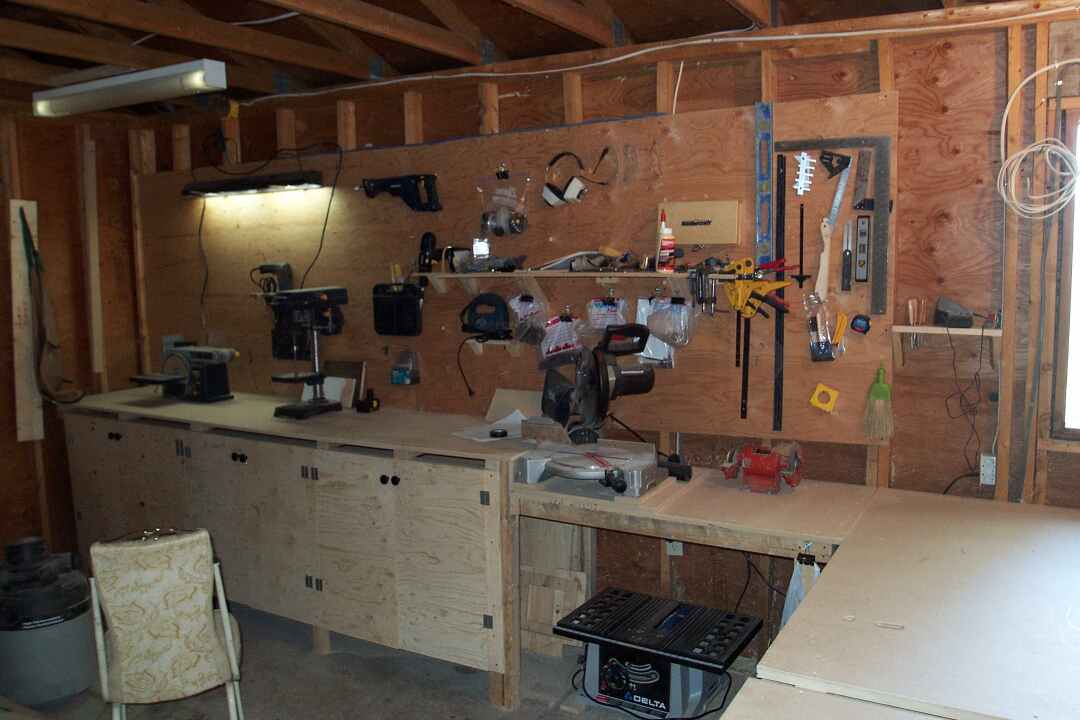
At the same time I added the MDF to the top of the old work bench I also built a work bench along the back of the garage perpendicular to the work bench. I had designed this to allow me to cut long pieces on the mitre saw, which it has proven to be wonderfully effective for most cuts. Due to the construction of the garage and the uneven concrete floor which has moved more than an INCH from winter to spring, the table is no longer level to the mitre saw. Without dismantling the entire bench I have been making modifications to the bench so I can level it again by ensuring it is only attached to the rear wall and "floats" on legs I can shim to level it.
Lets go over a few things you can see in the picture. First, is my Mitre Saw, this is a craftsmen 10" compound mitre saw with the laser trac. An excellent excellent tool. This was a gift from a rich friend. Under the mitre saw you can see the storage area for my Delta bench top saw, I find it a little lacking in places but very usable and for a $179 outlay very usable, I simply clamp the bench saw to the main work bench when I need to use it., I have been trying to modify the saw (read cut holes in it) to facilitate dust collection. My Son and I just recently put on the cabinet doors. They are simple 1/4 plywood cut to fit the openings, what I couldn't believe was the price of the hardware, hinges, closures and knobs. I bought the cheapest I could find and each door cost $5.46 just in mounting hardware. I have purchased the paint to paint the cabinets (tremclad) but just haven't had time to do the work yet. I am planning on doing the top of the tool area in tremclad as well.
Lets continue... You can see most of my power hand tools hanging from the wall, there is better picture of the tools and some descriptions here. The $79.99 8" drill press was originally purchased for my wife so she could use it as a drum sander replacement as well as drilling accurate entry holes. It is a usable tool. I am saving up to buy a much larger drill press for future projects, this one can't spin anything larger than a 1" bit, it just doesn't have the power to keep the bit turning. Run out on the quill is noticeable also. The bench sander was also
purchased for my wife to quickly sand to 90 degrees and sand down large objects
accurately, this was bought on sale for $119.99. Also, I haven't finished running the electrical. There are 2 new, each on their own breaker 20 amp circuits now coming into the garage. One also services the barn, but there is a junction box just over the bench sander where a new 4 plug unit will go. The other 20 amp circuit runs the plug you can see at the end of the work bench as well as 4 plug unit mount under the work bench out of the way. There is also the existing 15 amp service which I have modified only have the lights and a single plug on it. And a new 15 amp service which right now runs two switch able plugs under the OLD work bench. I plan to run that circuit over the by the mitre saw and place another 4 plug unit there. All of the electrical wiring needs ran properly. I am in the process of drilling the holes need to do that. Eventually as soon as I can find a cheap one, I will run a service direct to a breaker box in the garage. The shop isn't finished... are they ever? but is now very usable. Dust collection is a problem, my single shop vac gets over used and dragged around to each tool. I have had to make some modifications (read drill holes) to a few of my tools to make dust collection better. There are many more pictures here, caution SLOW LOADING.
|